
🔐LastPass Account Creation & Activation Guide
🔐 LastPass Account Creation & Activation Guide
This guide details the steps to create and activate your LastPass account from an invitation email. It is designed for new users who are receiving a company-issued LastPass invite.
📩 Step 1: Receive the Invitation Email
Check your email for a message from LastPass (sender: do-not-reply-support@lastpass.com) with a subject similar to “LastPass account created”
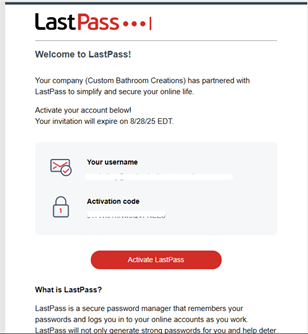
If not found, check your Spam, Promotions, or Clutter folders.
Note: A verification email will be sent to ensure that it's the user logging in when they change locations.
Step 2: Click the Activation Link
Inside the invitation email, click the “Activate Lastpass” which will take you to the LastPass account setup portal
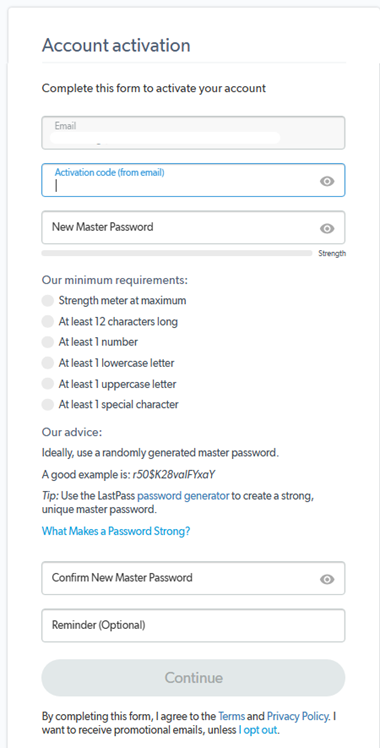
Step 3: Account Activation Code and Master Password
Copy the activation code in the first e-mail you received and paste it in the “Activation code” box.
Then, create a strong, complex and memorable password to access your LastPass Vault .
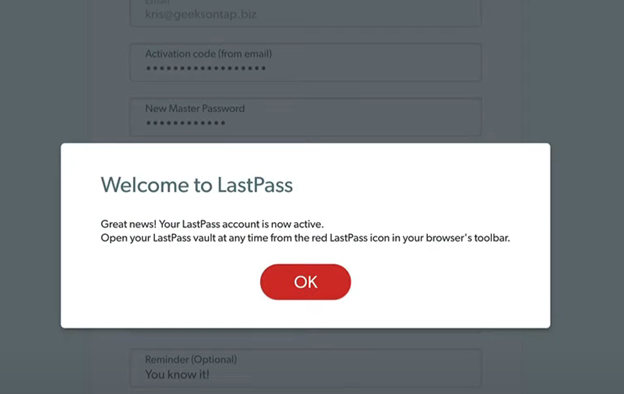
After entering the details, click 'Continue” and wait for the process to finish. If all is well, you'll get this notification.
🗂 Step 5: Access the Vault
You’ll be redirected to your LastPass Vault, your central dashboard for storing:
- Website logins
- Secure notes
- Payment cards
- Addresses

Step 6: Browser Extension
The extension is installed in Edge and Chrome, shown as follows:
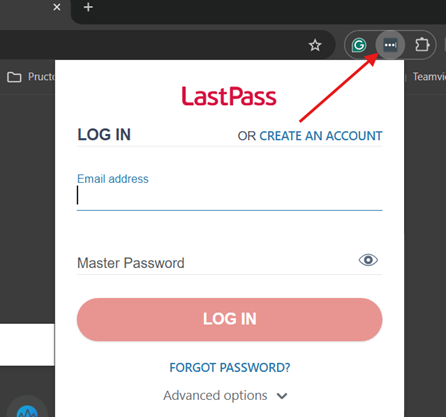
Enter your email and master password to log in to the extension.