
Apple Care - Warranty Replacement
Step 1 — Gather the details you'll need
- The device serial number (see Step 2).
- A clear description of the fault — what happens, when it started, and whether anything triggered it (drop, spill, software update).
- Your Apple Account (Apple ID) email address and password.
- Your device passcode.
- Proof of purchase, if you have it. Accounts can usually supply this.
Step 2 — Find the serial number
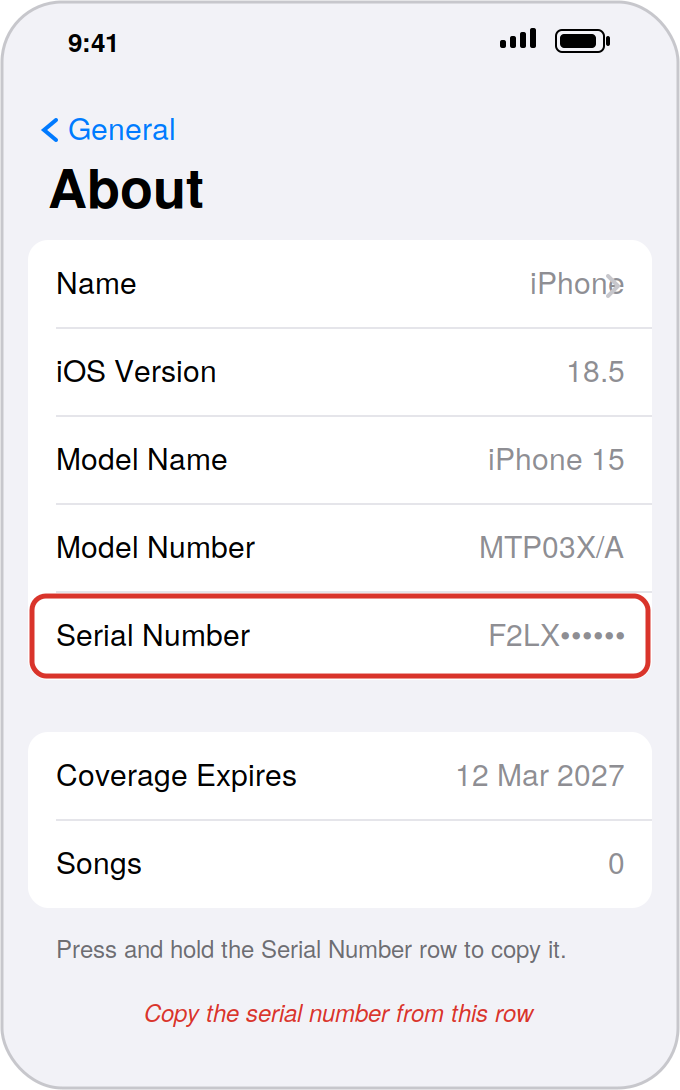
iPhone or iPad
- Open Settings.
- Tap General, then About.
- Scroll to Serial Number. Press and hold the row to copy it.
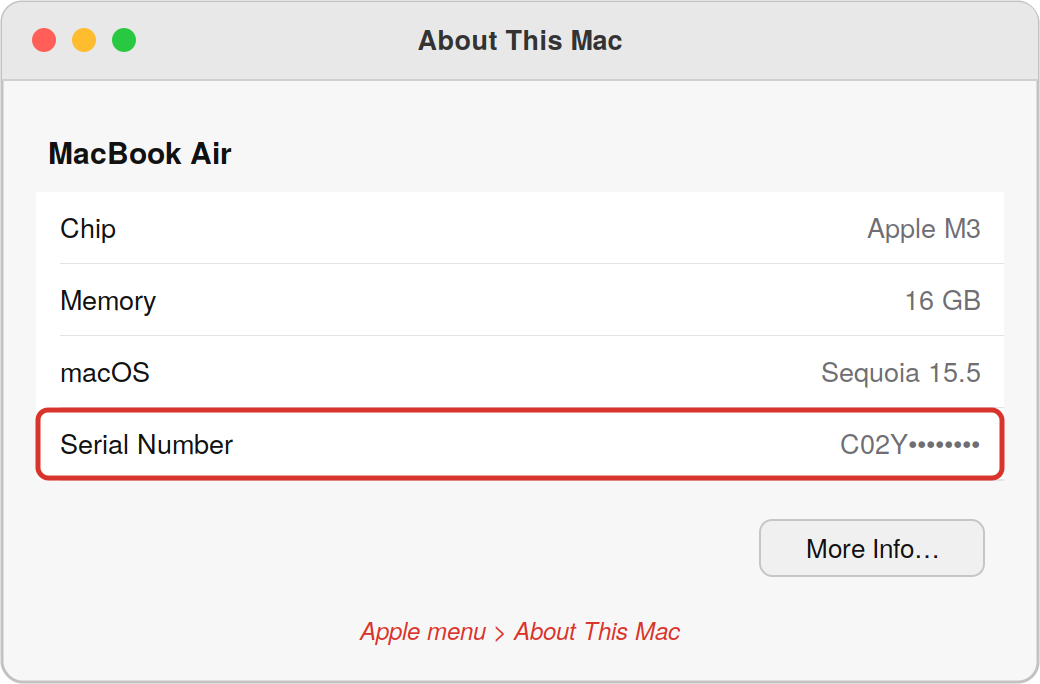
Mac
If the device won't turn on
- Check the original box — the serial number is on the barcode label.
- Or ask IT, who can look it up from your asset records.
Step 3 — Check the warranty status
- Go to https://checkcoverage.apple.com
- Enter the serial number and the on-screen code.
- Note what the page says about repair and service coverage, and the expiry date.
- Screenshot the result and attach it to your ticket.
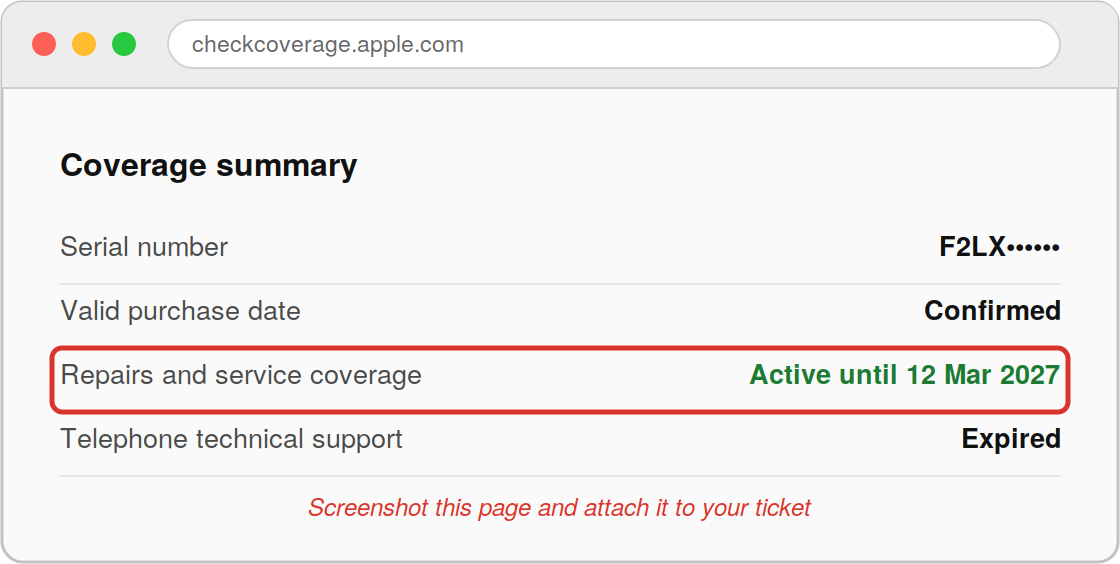
What the result means:
| Result | What it means |
|---|---|
| Covered by warranty or AppleCare | Repairs for faults are generally at no cost |
| Expired | Repairs are chargeable — get IT approval before proceeding |
| Accidental damage (cracked screen, liquid) | Usually chargeable, even under warranty. AppleCare+ may cover it with an excess fee |
Australian Consumer Law may still entitle you to a free repair even after the warranty expires. If Apple says a repair is chargeable and you think it shouldn't be, raise it with IT before agreeing to anything.
Step 4 — Back up the device
Do this before anything else. Assume everything on the device will be erased.
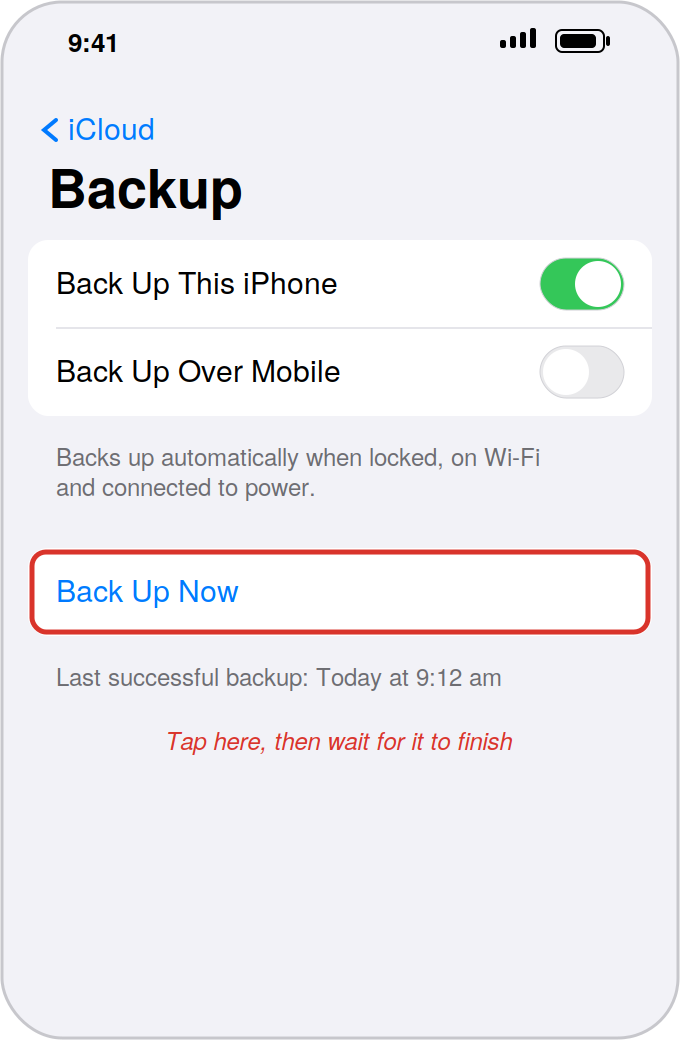
iPhone or iPad
- Connect to Wi-Fi and to power.
- Open Settings and tap your name at the top.
- Tap iCloud, then iCloud Backup.
- Tap Back Up Now and wait for it to finish.
Apple's own illustrated instructions: https://support.apple.com/en-au/108366
Mac
- Connect your Time Machine drive, or confirm your files are synced to OneDrive/SharePoint.
- Open System Settings, then General, then Time Machine, and run a backup.
- Check that anything stored only in local folders (Downloads, Desktop) is copied somewhere safe.
If you're unsure whether your work data is backed up, ask IT to confirm before you hand the device over.
Step 5 — Turn off Find My iPhone
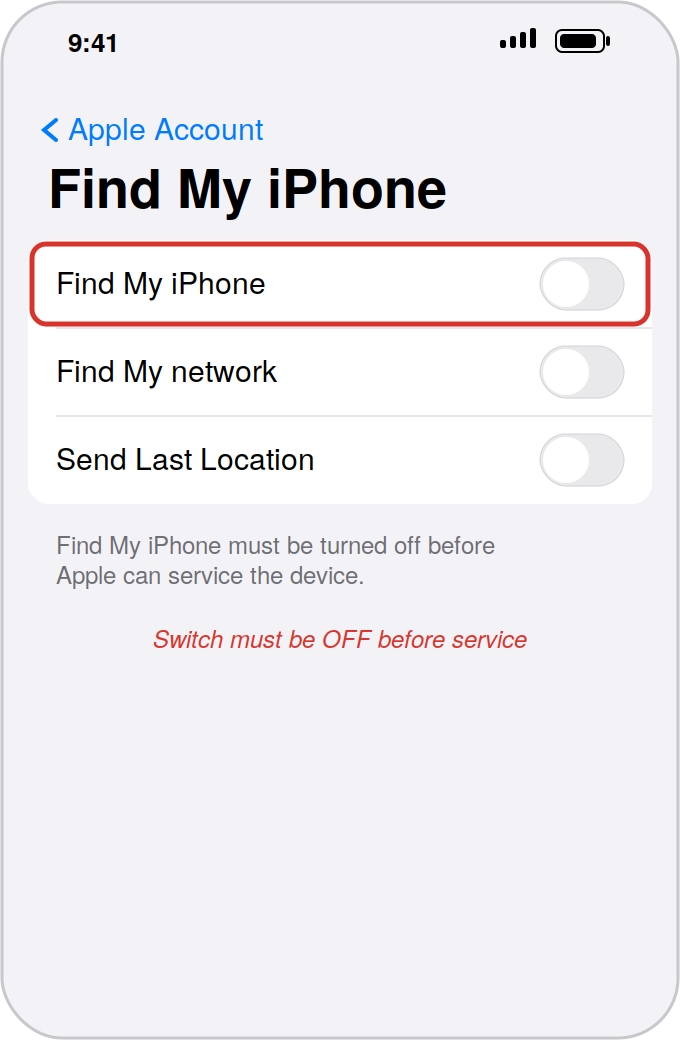
Apple generally can't service a device while Find My is still active, so this step is mandatory.
iPhone or iPad
- Open Settings and tap your name at the top.
- Tap Find My iPhone, then Find My iPhone (or Find My iPad).
- Turn the switch off and enter your Apple Account password.
Mac
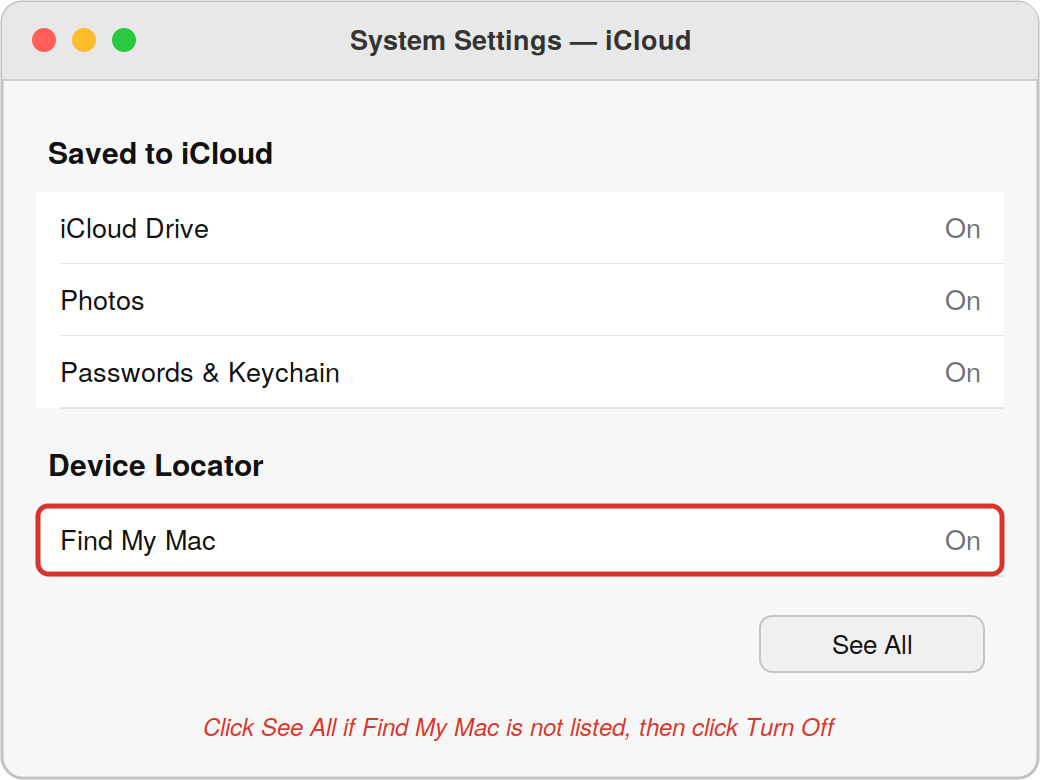
- Open System Settings and click your name at the top of the sidebar.
- Click iCloud, then See All (or Show All) if you can't see Find My Mac in the list.
- Click Find My Mac, then click Turn Off and enter your Apple Account password.
If the device won't turn on or you can't reach Settings
- Go to https://icloud.com/find on another device.
- Sign in with the same Apple Account.
- Select the device, then choose Remove This Device.
Also turn off Stolen Device Protection if it's enabled (Settings > Face ID & Passcode), otherwise Find My may refuse to switch off.
Apple's full pre-service checklist for iPhone and iPad: https://support.apple.com/en-au/109519
Step 6 — Log the repair with Apple
Pick one of the following. Online is usually fastest.
Option A — Online (recommended)
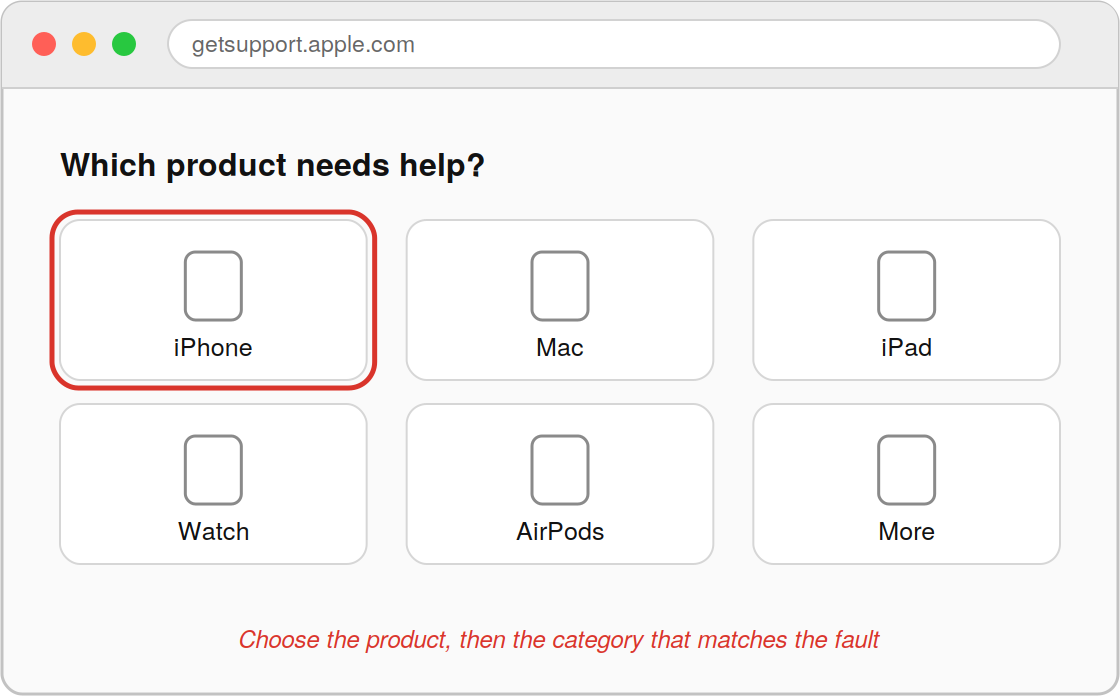
- Go to https://getsupport.apple.com
- Choose your product type.
- Choose the category that best matches the fault.
- Sign in with your Apple Account, or enter the serial number if prompted.
- Choose how you'd like the repair handled (see Step 7).
- Confirm your contact details and note down the case or repair number.
Option B — Apple Support app
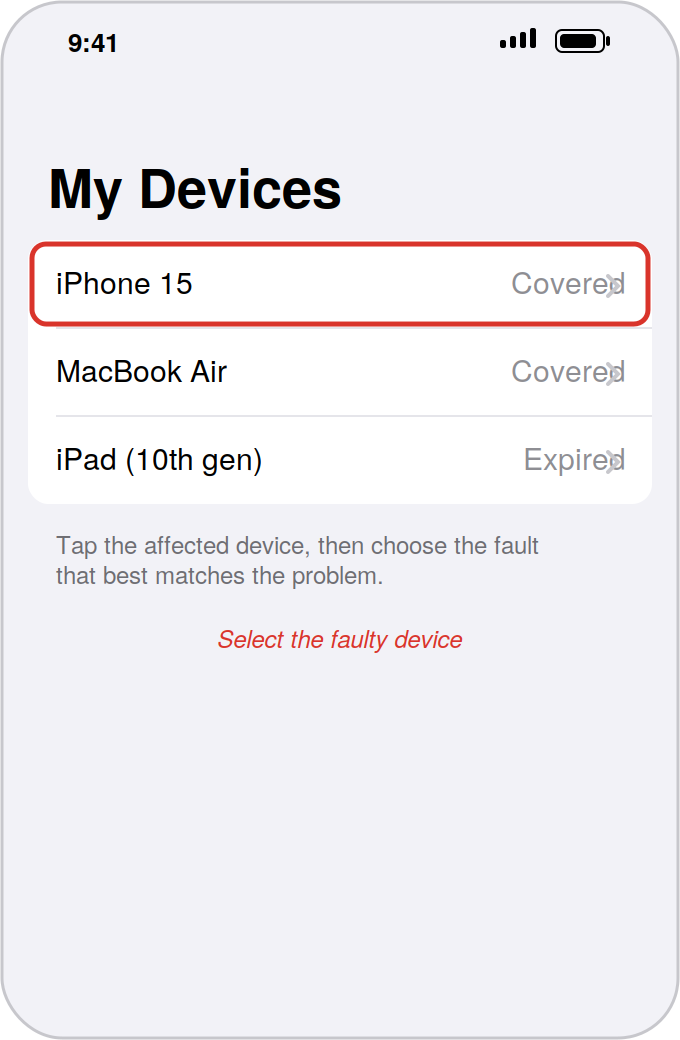
- Install Apple Support from the App Store on any Apple device.
- Sign in with your Apple Account.
- Select the affected device from My Devices.
- Choose the fault and follow the prompts to book service.
Option C — Phone
- Call Apple Support on 1300 321 456 (Australia).
- Have the serial number and fault description ready.
- Ask for the case number before ending the call.
Full list of Apple support numbers by country: https://support.apple.com/en-au/106932
Option D — Walk in
- Book a Genius Bar appointment at an Apple Store, or an appointment with an Apple Authorised Service Provider, at https://getsupport.apple.com
- Turn up at the scheduled time with the device and its charger if relevant.
Walk-ins without an appointment are often turned away, so book first.
Step 7 — Choose how the repair is handled
| Option | How it works | Typical turnaround |
|---|---|---|
| Carry-in | You take the device to an Apple Store or Authorised Service Provider | Same day to 5 business days |
| Send-in / courier | Apple sends a box or arranges a courier pickup | 5–10 business days |
| Onsite (Mac, business plans) | A technician attends your site | Varies |
| Express Replacement | Apple ships a replacement first; you return the faulty unit. Requires a credit card hold | 1–3 business days |
If you need the device for work, ask IT about a loan device rather than choosing whichever option is quickest.
Step 8 — Send or drop off the device
- Remove any case, screen protector, SIM card and memory card.
- Don't include chargers, cables or accessories unless Apple specifically asks for them.
- Keep a note of the case number, and the courier tracking number if one is issued.
- If posting, pack the device exactly as instructed and use the label Apple supplies.
- Never give anyone your Apple Account password or device passcode. Apple and its service providers will not ask for these.
Step 9 — Track the repair
- Go to https://support.apple.com/repair and choose the option to check an existing repair.
- Sign in, or enter the repair number and your surname.
- Apple will email you when the status changes.
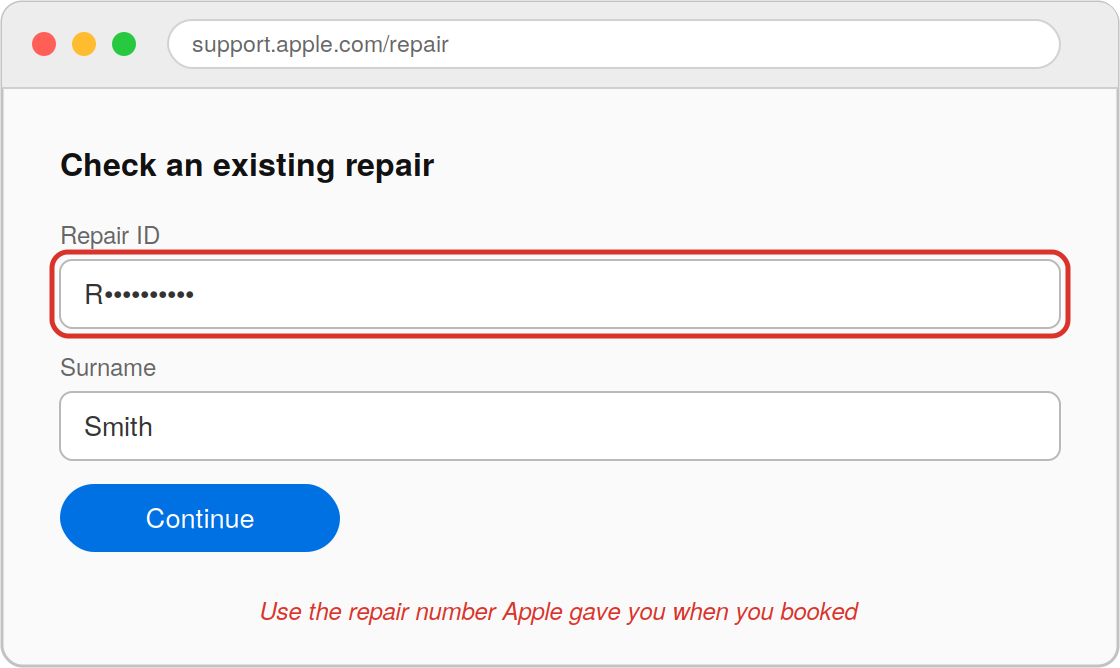
If nothing has moved for more than five business days, call 1300 321 456 with the repair number, or log a ticket with IT.
Step 10 — When the device comes back
- Check the device physically for damage and confirm the reported fault is fixed.
- Keep the paperwork — it lists what was replaced and any new warranty on the parts.
- If the device was replaced rather than repaired, tell IT straight away. A replacement has a new serial number and needs to be re-registered before it will set itself up with your work accounts.
- Turn the device on and follow the setup prompts.
- When asked, restore from your backup.
- Turn Find My iPhone back on.
- Sign back in to your work apps and confirm email and files are working.
If the device asks you to sign in with your work account during setup and something fails, stop and contact IT rather than skipping the step.
Common problems
"Apple says the device isn't covered." Send IT the serial number and the exact wording. Purchase records or a consumer-law argument may still get it covered.
"I can't turn off Find My because I don't know the Apple Account password." Contact IT. On a managed device the account may be one they control.
"Apple wants a credit card for Express Replacement." Don't use your personal card for a work device. Contact Accounts.
"The device is lost or stolen, not faulty." This is not a warranty matter. Report it to IT immediately so accounts can be secured.
Need help?
Contact the Computerman service desk with the device serial number, the fault description, and any Apple case number you've been given.